Monday, December 17, 2012
Deformable Terrain
I have added an algorithm to blast off (destroy) terrain based on user input. I am using the following algorithm to achieve the same.

- When the user clicks on the output screen, depending on the coordinates, a ray is generated from the camera into the screen.
- This ray is traced for a random distance and then the terrain at that location is marked for destruction.
- A random radius is generated.
- The center and the radius of the circle to be destroyed are stored in an array and passed to the Tessellation Evaluation Shader (TES).
- The TES flattens the height based on some value generated using Perlin noise.
- The TES then perturbs the vertices by small amounts to give the destroyed area some random shape.
The number of deformations are currently limited by the array size as the 4.0 shaders do not allow dynamic arrays.

The red ellipse above shows the destroyed part of the terrain
Friday, December 14, 2012
Heightmaps
Until now I was generating terrains using Perlin noise. Won't it be nice to generate terrain based on your needs. In comes heightmaps. Made few small changes and got the program to load heightmaps. Below is terrain generated using a height map of some place in Norway (from USGS maps)


As you can see, I displaced the water a bit to give some effect. But have to apply a water shader to make it look like water.

The height map used - West Norway

Terrain using height map
As you can see, I displaced the water a bit to give some effect. But have to apply a water shader to make it look like water.
Thursday, December 13, 2012
Adding more substance
Added fog to the terrain, to give a better feel and better feel of the depth of terrain. I added a linear fog based on depth and used the smoothstep and the mix functions to get the effect of fog.

Then I pictured that while travelling by flight, you see a lot of fog down in the lower areas in mountainous regions and the peaks just stand out of the fog. So I went ahead and implemented fog based on height. The lower the terrain, the thicker the fog is. Below is what I got as the output.


Fog based on depth
Then I pictured that while travelling by flight, you see a lot of fog down in the lower areas in mountainous regions and the peaks just stand out of the fog. So I went ahead and implemented fog based on height. The lower the terrain, the thicker the fog is. Below is what I got as the output.

Fog based on height above ground
Combining both of these, gives the effect as seen below.

Next Steps:
- Deform terrain
- Load a heightmap
Screen based rendering
To implement any screen space algorithms, I needed to have mutpli rendering passes. The first pass will cover all that I did as mentioned below and then the second pass will work in screen space.
I attacjed the outputs from the fragment shaders to different textures and then passed it on to the next rendering cycle. The depth buffer values were attached to a texture as well as positions, normals and colors. In the second pass, I just create 2 screen space triangles and then used the values from these textures to determine what gets shaded and what doesn't. Though I had done something similar as part of another assignment, this was a good learning experience for getting the 2 passes to work correctly. Once the 2 passes were running smoothly one after the other, I implemented the algorithm to get normals using the screen space. The algorithm takes the values of the neighboring pixels and then finds the world space coordinates for these pixels. Then taking the difference of values in the x-direction and taking the cross product with values in the y-direction, gives the normal for the terrain, The normals have to be handled with special cases at the edges because the neighboring pixels may have a completely different depth at the edges.

I attacjed the outputs from the fragment shaders to different textures and then passed it on to the next rendering cycle. The depth buffer values were attached to a texture as well as positions, normals and colors. In the second pass, I just create 2 screen space triangles and then used the values from these textures to determine what gets shaded and what doesn't. Though I had done something similar as part of another assignment, this was a good learning experience for getting the 2 passes to work correctly. Once the 2 passes were running smoothly one after the other, I implemented the algorithm to get normals using the screen space. The algorithm takes the values of the neighboring pixels and then finds the world space coordinates for these pixels. Then taking the difference of values in the x-direction and taking the cross product with values in the y-direction, gives the normal for the terrain, The normals have to be handled with special cases at the edges because the neighboring pixels may have a completely different depth at the edges.

Screen Space Ambient Occlusion using Poisson disk
Tessellation based on distance
As mentioned previously, I got my tessellation working, but it tessellated the entire geometry. So then I went on to implement a distance based tessellation. The goal was to have multiple levels of tessellation based on distance from camera. So I separated out the distance between the near and far planes and did a gradual tessellation based on distance. This speeds up the frame rate of display. It increased quite a bit. I was getting about 6-9 fps which increased to around 40-50 fps.
Then I realized that I was just basing my tessellation on z-distance and the terrain was getting tessellated on the left and the right. I think clipping happens later, so the terrain is tessellated even if it is out of view, though it doesn't get rasterized. So I then went on to calculate which vertices actually lie in the frustum of the camera and made sure that only those vertices get tessellated. Even this gave me a 4-5 fps increase.
The image and video below shows the tessellation of the terrain. This is just a constant tessellation for display, but I have modified it to tessellate to certain distance and then keep on decreasing tessellation as we move further away.

Tessellation based on distance from camera
Video shows tessellation based on distance from camera
Next steps:
- Ambient Occlusion
- Screen space normals
Monday, December 3, 2012


Sunday, December 2, 2012
Tessellation Shader
Added a Tessellation shader to the project. The Tessellation shader is made up of 3 parts (2 programmable and 1 fixed)


OpenGL Basic Rendering Pipeline
The flowchart above shows the basic OpenGL Rendering pipeline. In this project I have modified all the programmable stages shown in green above. The Tessellation shader consists of the Tessellation Control Shader which is called for every vertex coming out from the Vertex shader and they know what are the other vertices that make up the primitive. It is here that we assign the inner and outer tessellation levels for a triangle. The inner level determines how many concentric primitives will be created during tessellation of a single primitive; while the outer level determines how the concentric primitives will be attached to each other. The OpenGL Insights book - Chapter 6 explains this well. The OpenGL specifications for Tessellation shaders is also a good read. So once this is set, it is sent off to the Tessellator which does the actual tessellation by creating new vertices and primitives. The Tessellation Evaluation Shader (TES) is then called which I used to generate the actual coordinates of the vertices generated in world space. What comes out of the TES, in case of triangle primitives, are barycentric coordinates and in case of quads they are uv values. These can then be interpolated with the original primitive coordinates to get the final values.
This output from here is passed on to the Geometry Shader, where I calculate the normals for the primitives (details in previous blog post). Few images based on different tessellation levels are shown below. Right now I am doing a straight tessellation for all geometry present in the scene, which will be later changed to tessellation based on distance.

No Tessellation - 30 fps

Tessellation applied - Inner: 2, Outer: 2 - 9 fps

Tessellation applied - Inner: 3, Outer: 2 - 6 fps
I haven't yet displaced the tessellated vertices and so they appear on the same plane as the original primitive. Due to this, shading is not affected by tessellation currently.
Next Steps:
- Displacement of tessellated vertices
- Tessellation based on distance
Helpful Links:
Saturday, December 1, 2012
Geometry Shader
Added a geometry shader to the code for calculating face normals. The Geometry Shader is called after the Vertex assembly for each primitive. So it has all the information about a primitive, thus making it easy to calculate normals for a face. But the problem here is that shading will be flat for a single triangle which might not be an issue after I apply tessellation. Will have to wait and see when I implement tessellation. Below are images with diffuse lighting (A single directional light in the -ve y-direction)


Mesh structure

Diffuse Shading with normals
The terrain looks faceted with this change, with allowed to get some diffuse lighting.
Next Steps:
- Tessellation
Basic Terrain
I was looking into different literature for generating terrains and finally decided to start off with the basic one - using height fields. The following is an algorithm to generate a simple terrain to start off with.


- Get a heightfield (you can get it using an image or generate it using noise). I decided to use Perlin noise to create a heightfield.
- Create a flat triangular mesh (flat = y-coordinate is same for all the vertices).
- Perturb the vertices in the vertex shader using the heightfield values. The noise is generated in the vertex shader itself. More details on the noise generated below.
- Shade the mesh in the fragment shader. Can shade with different colors based on elevation too.
The noise function that I used was adapted from http://www.sci.utah.edu/~leenak/IndStudy_reportfall/PNoiseCode.txt. Perlin noise generates random values based on a Hermite curve. This gives a continuous value for the randomly generated values. It randomly generates values based on a frequency that you pass in and generate a curve based oin these values. THe intermediate values are then determined using this curve. I clamped the output a bit so that I have more flat areas in my terrain.
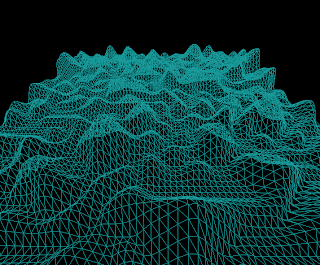
Shown below are outputs generated from my first stab at the algorithm. The images display the mesh instead of the shaded polygons as I haven't yet calculated normals for the primitives.
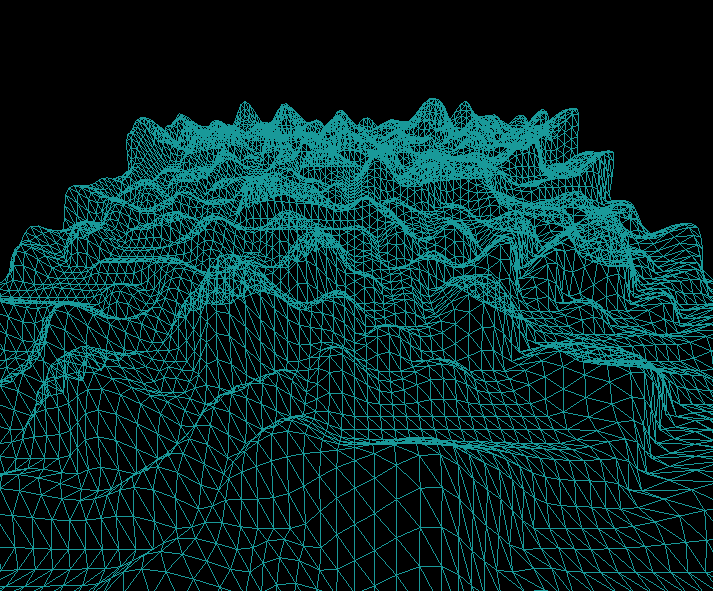
Basic Mesh Output

Terrain Depth

Color coded based on height
Next Steps:
- Calculate normals for the primitives.
- Shade terrain using the normal values (diffuse shading).
- Tessellate the geometry using the Tessellation Shader.
Wednesday, November 21, 2012
Introduction
As my final project for the GPU Programming course, I have decided to implement procedural terrain generator using the Tesselation Shader available in latest versions of OpenGL.
Goal: Terrain Generation on the GPU with increasing level of detail using
tessellation depending on the camera position.
This is inspired by my love for the outdoors, landscape photography and the work seen at TerraGen and Procedural Worlds.
This is inspired by my love for the outdoors, landscape photography and the work seen at TerraGen and Procedural Worlds.
Features I am planning to implement:
The code for my implementation is present here (https://github.com/tijutv/GPU-Terrain-Generation).
- Basic Terrain Generation on the GPU using OpenGL
- Use Tessellation shader available in newer versions of OpenGL.
- Detect slope of terrains and change textures based on the slope.
The code for my implementation is present here (https://github.com/tijutv/GPU-Terrain-Generation).
References:
-
GPU Gems 3 - Generating Complex Procedural Terrains Using the GPU (http://http.developer.nvidia.com/GPUGems3/gpugems3_ch01.html)
- http://outerra.blogspot.com/search/label/fractal%20terrain - My Lecturer for the course, Patrick Cozzi, sent me this link for reference
Subscribe to:
Comments (Atom)